win11利用wsl2实现linux安装node+git+nginx+docker搭建前端自动化工程
🙂 前言
小波原计划是直接装个双系统上 linux 搭建 node+git+nginx+docker+gitee+gitlab+jenkins 前端自动化工程,在好友2broear的指引下,发现了 wsl2 …果断玩起来先。
什么是 WSL2
WSL 全称为 Windows Subsystem for Linux,官网译为:适用于 Linux 的 Windows 子系统 (WSL)。
WSL1 和 WSL2 的比较:
| 功能 | WSL 1 | WSL 2 |
|---|---|---|
| Windows 和 Linux 之间的集成 | ✅ | ✅ |
| 启动时间短 | ✅ | ✅ |
| 与传统虚拟机相比,占用的资源量少 | ✅ | ✅ |
| 可以与当前版本的 VMware 和 VirtualBox 一起运行 | ✅ | ✅ |
| 托管 VM | ❌ | ✅ |
| 完整的 Linux 内核 | ❌ | ✅ |
| 完全的系统调用兼容性 | ❌ | ✅ |
| 跨 OS 文件系统的性能 | ✅ | ❌ |
小波个人体验总结:如果不是重度需求 linux 系统,完全可以使用 wsl2 来搭建 linux 系统相关的开发环境
🙂 总纲
- 检查环境,安装 wsl2 和 ubuntu22,注册 ubuntu22
- 安装 vscode 插件 wsl
- 更改 ubuntu22 镜像源
- 调整 wsl2 占用内存和 cpu,终端颜色丢失
- 安装 nvm , node , pnpm
- 安装 git
- 安装 ngnix
- 安装 docker
- 固定 wsl2 静态 ip
- 安装 zsh , oh my zsh
🤔 wsl2 实现 linux 安装 node+git+nginx+docker 搭建前端工程自动化步骤
第一步:检查环境,安装 wsl2 和 ubuntu22
必须运行 Windows 10 版本 2004 及更高版本(内部版本 19041 及更高版本)或 Windows 11
任务栏 –> 性能 –> 确认右边的 CPU 相关信息中 虚拟化:已启用
win+r打开运行,输入systeminfo,输出信息的最后一行确认 Hyper-V 是否支持1
Hyper-V 要求: 已检测到虚拟机监控程序。将不显示 Hyper-V 所需的功能。win+r打开运行,输入optionalfeatures,如图,勾选 适用于 Linux 的 Windows 子系统,虚拟机平台,Hyper-V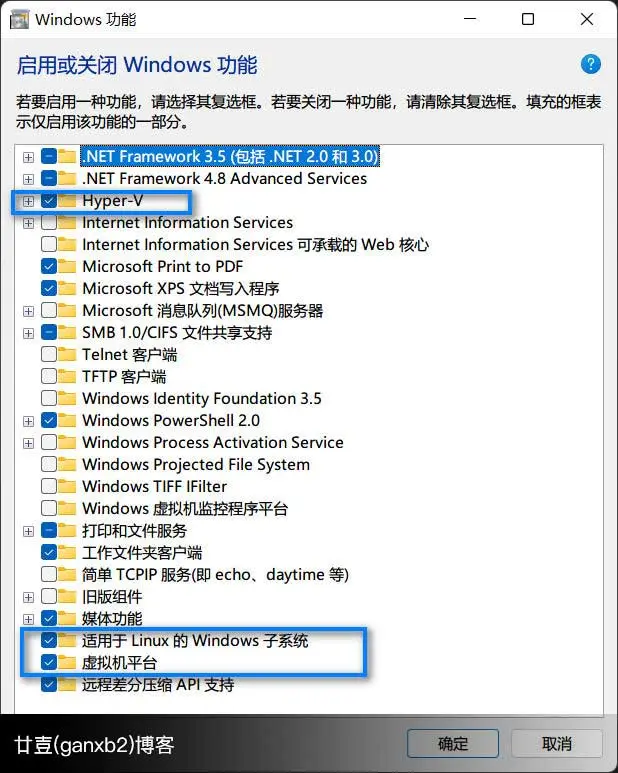
注意
如果你跟小波一样都是 win11 家庭版,很可能没有 Hyper-V 选项
解决办法:
桌面新建个文本.txt,复制以下代码贴入,然后更改文件名:hyper.cmd,再右键以管理员身份运行,下载会有点久,下载完成后重启电脑
1
2
3
4
5
pushd "%~dp0"
dir /b %SystemRoot%\servicing\Packages\*Hyper-V*.mum >hyper-v.txt
for /f %%i in ('findstr /i . hyper-v.txt 2^>nul') do dism /online /norestart /add-package:"%SystemRoot%\servicing\Packages\%%i"
del hyper-v.txt
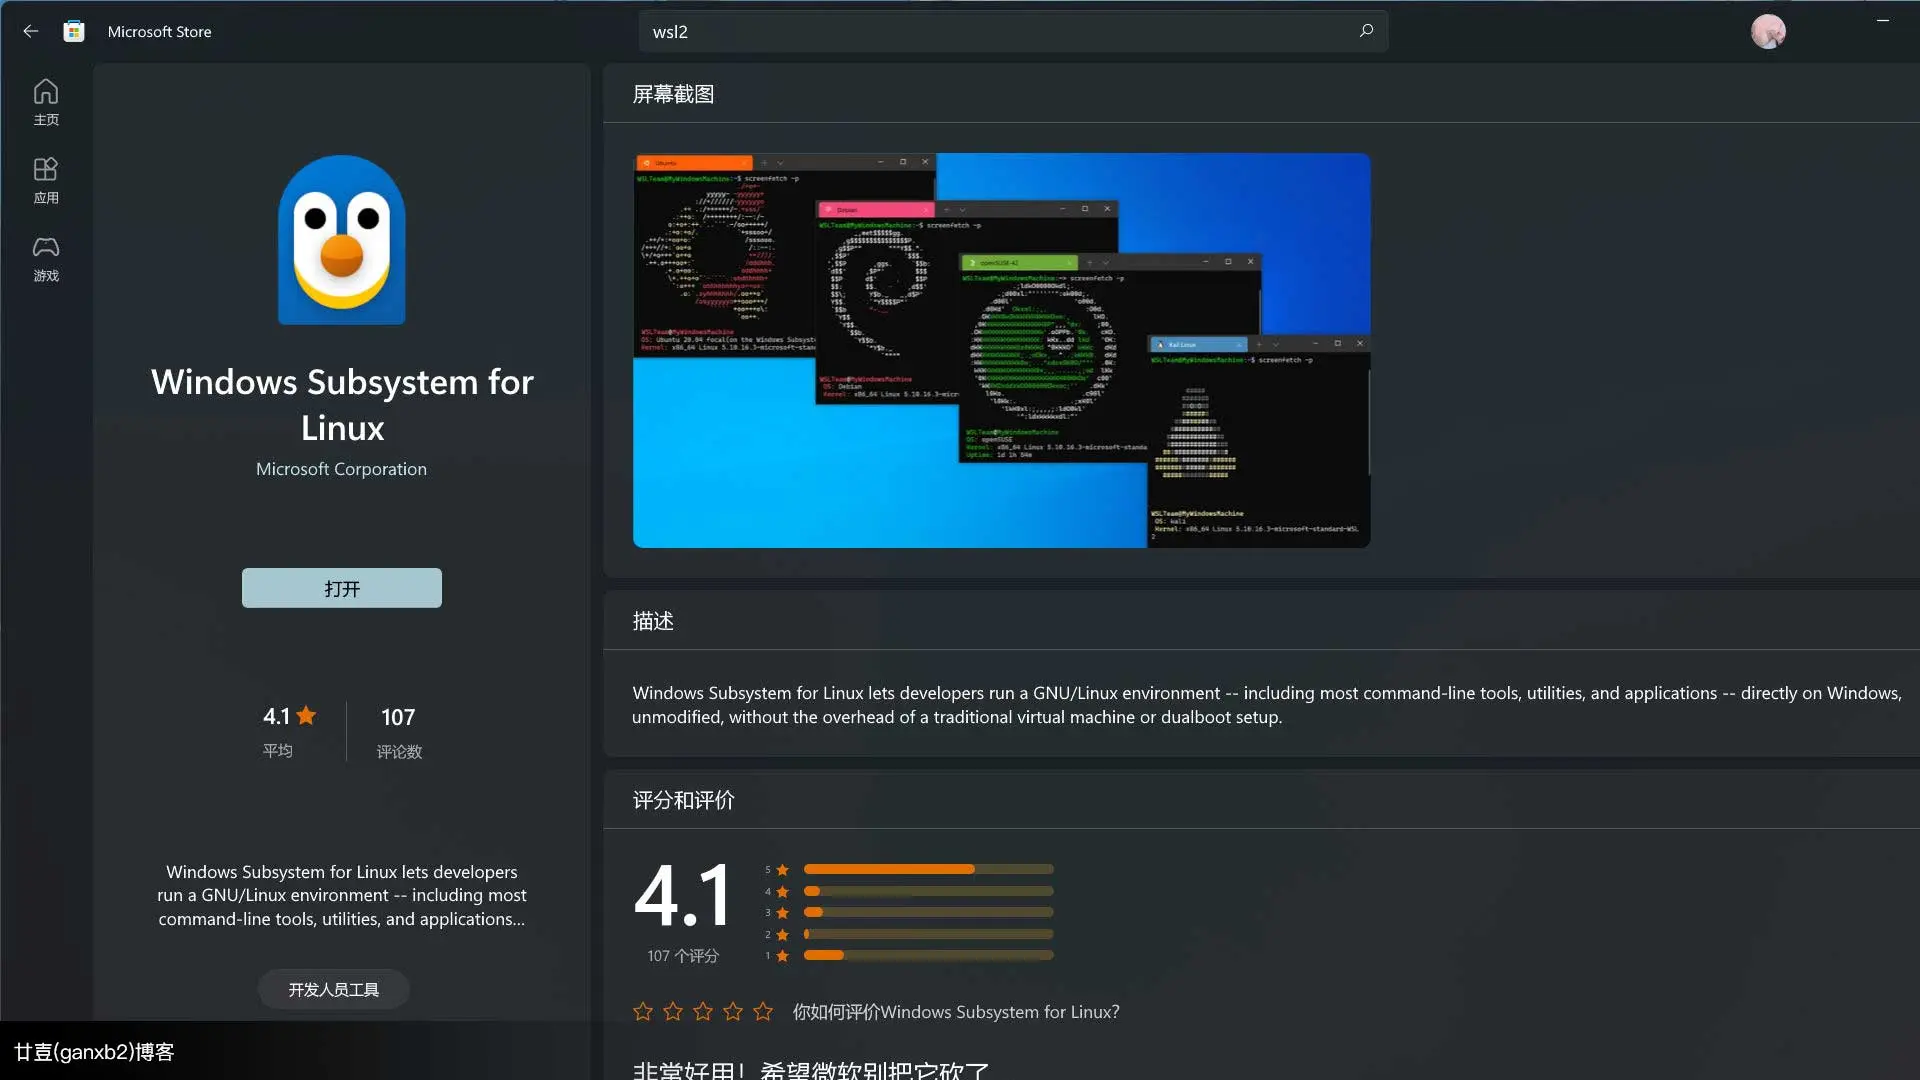
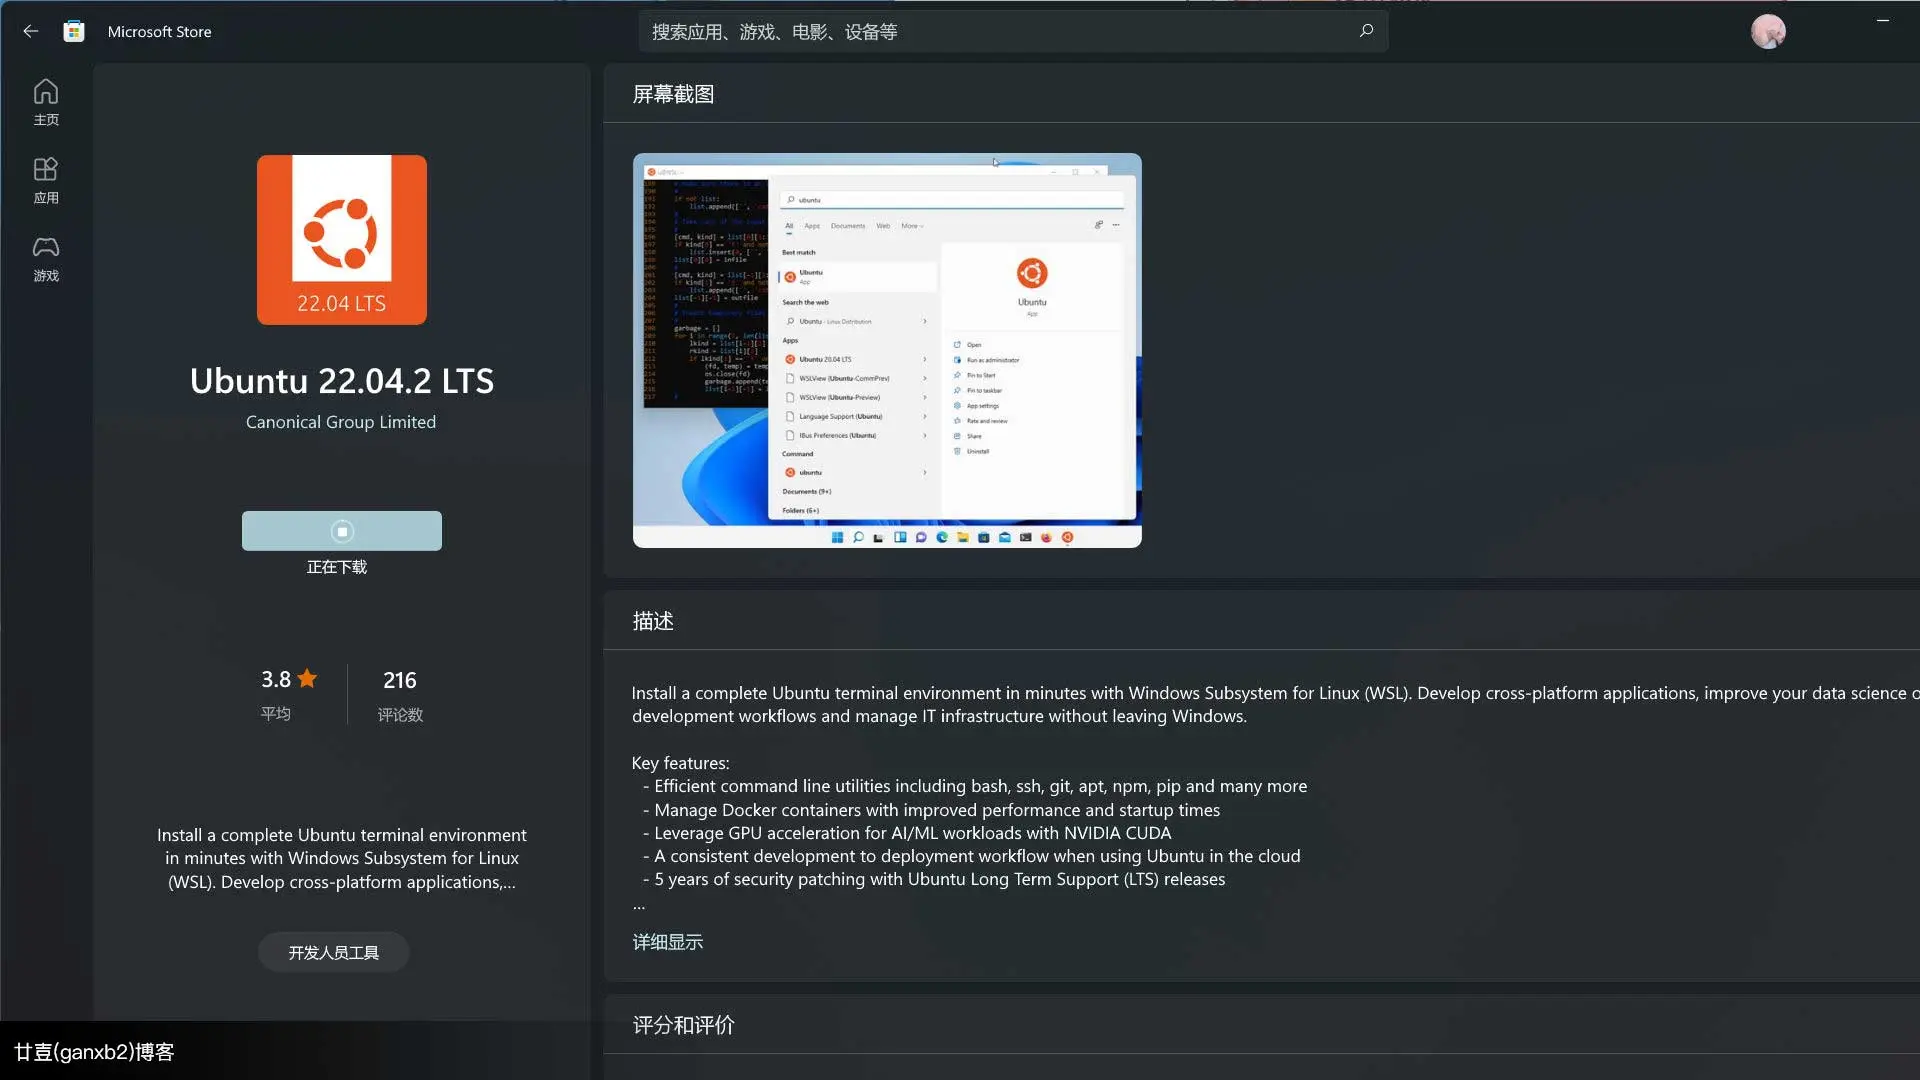
Dism /online /enable-feature /featurename:Microsoft-Hyper-V-All /LimitAccess /ALLwindows 商店安装 wsl2 和 ubuntu22
wsl2 安装成功的命令提示
1
2
3
4
5
6
7
8
9
10
11
12
13
14
15
16
17
18
19
20
21
22
23
24
25
26
27
28
29
30
31
32
33
34
35
36
37
38
39
40
41
42
43
44
45
46
47
48
49
50
51
52
53
54
55
56
57
58
59
60
61
62
63
64
65
66
67
68
69
70
71
72
73
74
75
76
77
78
79
80
81
82
83
84
85
86
87
88
89
90
91
92
93
94
95
96
97
用法: wsl.exe [参数] [选项...] [命令行]
运行 Linux 二进制文件的参数:
如果未提供命令行,wsl.exe 将启动默认 shell。
--exec, -e <命令行>
在不使用默认 Linux Shell 的情况下执行指定的命令。
--
按原样传递其余命令行。
选项:
--cd <目录>
将指定目录设置为当前工作目录。
如果使用了 ~,则将使用 Linux 用户的主页路径。如果路径
以 / 字符开头,将被解释为绝对 Linux 路径。
否则,该值一定是绝对 Windows 路径。
--distribution, -d <分发>
运行指定分发。
--user, -u <用户名>
以指定用户身份运行。
--system
为系统分发启动外壳。
用于管理适用于 Linux 的 Windows 子系统的参数:
--help
显示用法信息。
--install [选项]
安装额外的适用于 Linux 的 Windows 子系统分发。
要获得有效分发列表,请使用“wsl --list --online”。
选项:
--distribution, -d [参数]
按名称下载并安装分发。
参数:
有效分发名称(不区分大小写)。
示例:
wsl --install -d Ubuntu
wsl --install --distribution Debian
--set-default-version <Version>
更改新分发的默认安装版本。
--shutdown
立即终止所有运行的分发及 WSL 2
轻型实用工具虚拟机。
--status
显示适用于 Linux 的 Windows 子系统的状态。
--update [Options]
如果未指定任何选项,则将 WSL 2 内核更新
为最新版本。
选项:
--rollback
恢复为 WSL 2 内核的先前版本。
--inbox
仅更新收件箱 WSL 2 内核。不要从 Microsoft Store 下载 WSL。
--web-download
从 Internet 而不是 Microsoft Store 下载最新版本的 WSL。
用于管理适用于 Linux 的 Windows 子系统中的分发的参数:
--export <Distro> <FileName>
将分发导出到 tar 文件。
对于标准输出,文件名可以是 -。
--import <Distro> <InstallLocation> <FileName> [Options]
将指定的 tar 文件作为新分发导入。
对于标准输入,文件名可以是 -。
选项:
--version <Version>
指定要用于新分发的版本。
--list, -l [Options]
列出分发。
选项:
--all
列出所有分发,包括
当前正在安装或卸载的分发。
--running
仅列出当前正在运行的分发。
--quiet, -q
仅显示分发名称。
--verbose, -v
显示所有分发的详细信息。
--online, -o
显示使用“wsl --install”进行安装的可用分发列表。
--set-default, -s <分发>
将分发设置为默认值。
--set-version <分发> <版本>
更改指定分发的版本。
--terminate, -t <分发>
终止指定的分发。
--unregister <分发>
注销分发并删除根文件系统。
--mount <磁盘>
在所有 WSL2 分发中连接并装载物理磁盘。
选项:
--bare
将磁盘连接到 WSL2,但不装载。
--type <类型>
装载磁盘时使用的文件系统,如果未指定,默认为 ext4。
--options <选项>
其他装载选项。
--partition <索引>
要装载的分区的索引,如果未指定,默认为整个磁盘。
--unmount [磁盘]
从所有 WSL2 分发中卸载并分离磁盘。
如果不带参数调用,则会卸载并分离所有磁盘。windows 的终端中,直接打开 ubuntu
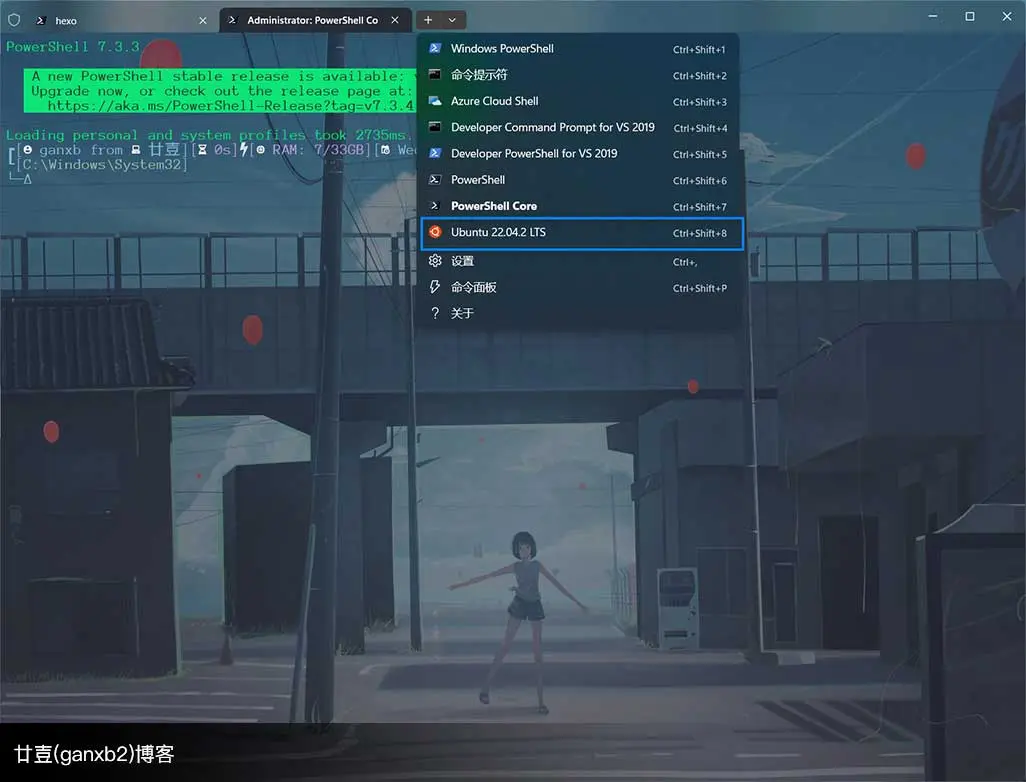
初次打开 linux 发行版 ubuntu 时,需要设置用户名和密码,注册成功后提示如下
1
2
3
4
5
6
7
8
9
10
11
To run a command as administrator (user "root"), use "sudo <command>".
See "man sudo_root" for details.
Welcome to Ubuntu 22.04.1 LTS (GNU/Linux 5.15.90.1-microsoft-standard-WSL2 x86_64)
* Documentation: https://help.ubuntu.com
* Management: https://landscape.canonical.com
* Support: https://ubuntu.com/advantage
This message is shown once a day. To disable it please create the
/home/ganxiaobo/.hushlogin file.顺便把 root 也注册一下,方便后面使用
1
sudo passswd root
第二步:安装 vscode 插件 wsl
为了后续操作可视化,所以装这个插件远程连接
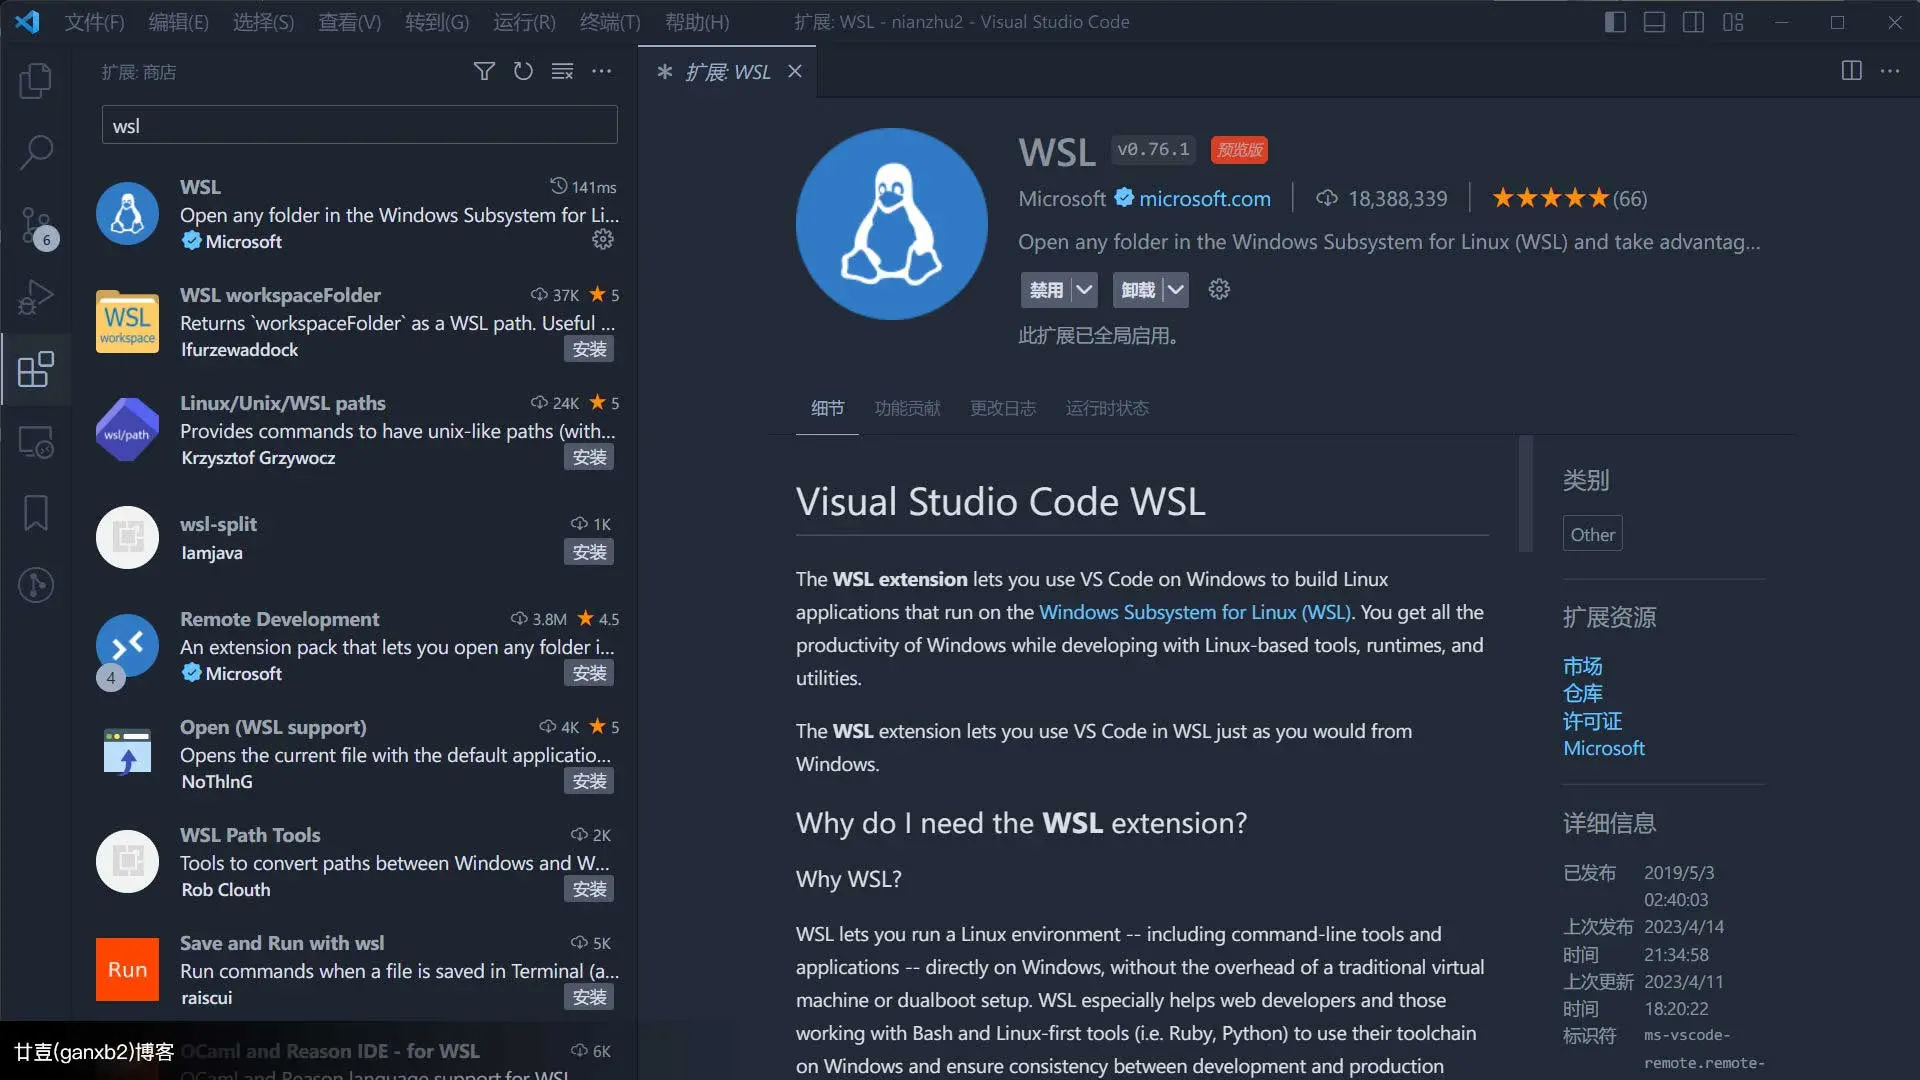
安装好后点击 vscode 左下角的 >< 会自动连接,然后点击打开文件夹,把目录改成 /
第三步:更改 ubuntu22 镜像源
22.04 是 jammy 源,20.04 是 focal 源,但是这个小波自己测试发现 22 也可以使用 focal
修改文件权限
1
sudo chmod 777 /etc/apt/sources.list关于
chmod 777说明1
2
3
4
5
6
7
8
9
10
11
12
13
14
15
16
17
18
19
20
21文件或目录的权限又分为3种:只读、只写、可执行。
Linux系统中,每个用户的角色和权限划分的很细致也很严格,每个文件(目录)都设有访问许可权限,利用这种机制来决定某个用户通过某种方式对文件(目录)进行读、写、执行等操作。
操作文件或目录的用户,有3种不同类型:文件所有者、群组用户、其他用户。最高位表示文件所有者的权限值,中间位表示群组用户的权限值,最低位则表示其他用户的权限值,所以,chmod 777中,三个数字7分别对应上面三种用户,权限值都为7。
文件或目录的权限又分为3种:只读、只写、可执行。
权限 权限数值 二进制 具体作用
r 4 00000100 read,读取。当前用户可以读取文件内容,当前用户可以浏览目录。
w 2 00000010 write,写入。当前用户可以新增或修改文件内容,当前用户可以删除、移动目录或目录内文件。
x 1 00000001 execute,执行。当前用户可以执行文件,当前用户可以进入目录。
依照上面的表格,权限组合就是对应权限值求和,如下:
7 = 4 + 2 + 1 读写运行权限
5 = 4 + 1 读和运行权限
4 = 4 只读权限
因此,大家也就明白了 chmod 754 filename 命令的含义了。
这句命令的意思是将filename文件的读写运行权限赋予文件所有者,把读和运行的权限赋予群组用户,把读的权限赋予其他用户。sources.list 内容替换
1 | |
更新
1
2
3
4
5
6sudo apt update
// 输出
Reading package lists... Done
Building dependency tree... Done
Reading state information... Done
1 package can be upgraded. Run 'apt list --upgradable' to see it.
第四步:调整 wsl2 占用内存和 cpu,终端颜色丢失
用户文件夹
C:\Users\yourname创建文件.txt,贴入以下代码然后改名Vmmem.wslconfig1
2
3
4
5#.wslconfig
[wsl2]
memory=3GB //分配给WSL内存3GB
swap=4GB //设置交换分区4GB
localhostForwarding=trueubuntu 终端颜色丢失
home/yourname/.profile添加如下代码1
2
3
4
5
6if [ "$BASH" ]; then
if [ -f ~/.bashrc ]; then
. ~/.bashrc
fi
fi
mesg n然后执行
source ~/.profile
第五步:安装 nvm , node , pnpm
创建文件 .bash_profile
1
vim .bash_profile贴入以下代码
1
source ~/.bashrc然后 .bashrc && .profile 贴入以下代码
1
2export NVM_DIR="/$HOME/.nvm"
[ -s "$NVM_DIR/nvm.sh" ] && . "$NVM_DIR/nvm.sh"如果用的命令,按下 ESC,然后
:wq回车保存执行下面这句代码
1
souce .bash_profile报错找不到 souce,切换 root
1
sudo -s执行以下代码 选
no1
sudo dpkg-reconfigure dash查看切换是否切换成功
因为 ubuntu 默认使用软连接 dash,而 nvm 安装使用的 bash
1 | |
安装 nvm
1
curl -o- https://raw.githubusercontent.com/nvm-sh/nvm/master/install.sh | bash安装 node,pnpm
1
2nvm install 16.14
npm install pnpm -g
第六步:安装 git
提供 PPA 源安装方式,这是一种快速方便的软件安装方法
1
sudo add-apt-repository ppa:git-core/ppa更新
1
sudo apt update安装
1
sudo apt install git查看
1
2
3git --version
// 输出
git version 2.22.0配置 git 帐号和 ssh
1
2git config --global user.name "xxxx" //xxx为你的用户名
git config --global user.email xxxx@xx.com //xxx为你的邮箱查看 git 配置
1
2
3
4git config --list
// 输出 git config --list 最后出现一个 (END) ,要等一会才能退出来
原因: git日志过多最后显示end无法输入命令,打印的信息是全部用户配置的,表示可以用了。
直接按 q (或+Enter) , 即可退出;生成密钥
1
ssh-keygen -t rsa -C xxxx@xx.com //xxx为你的邮箱注意
和 windows 生成密钥一样,直接空格。这里的密码不是验证账户操作,是给 ssh 命令拉代码配置密码。
linux 这里 无法创建 .ssh 文件夹,密钥和公钥文件名是空。需要自己手动改一下
密钥文件 id_rsa 内容
-----BEGIN OPENSSH PRIVATE KEY----- ...公钥文件 id_rsa.pub 内容
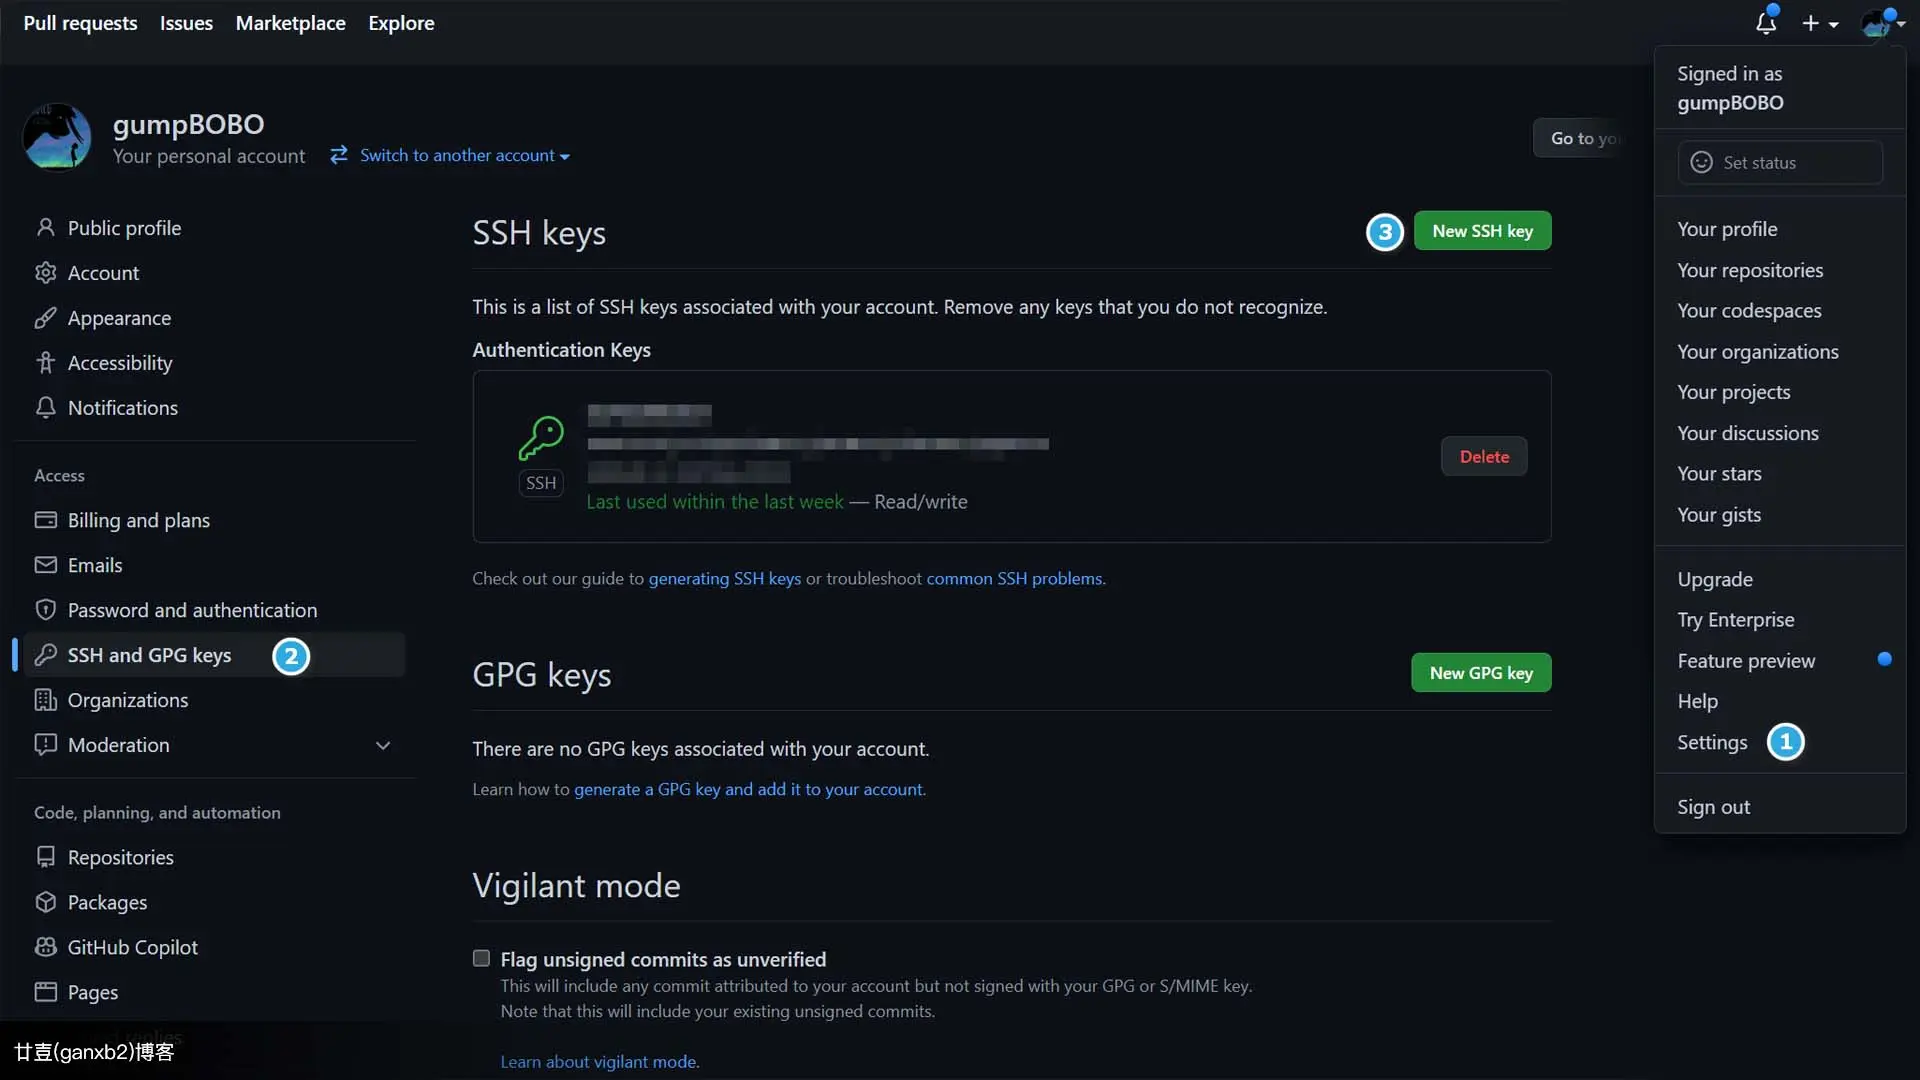
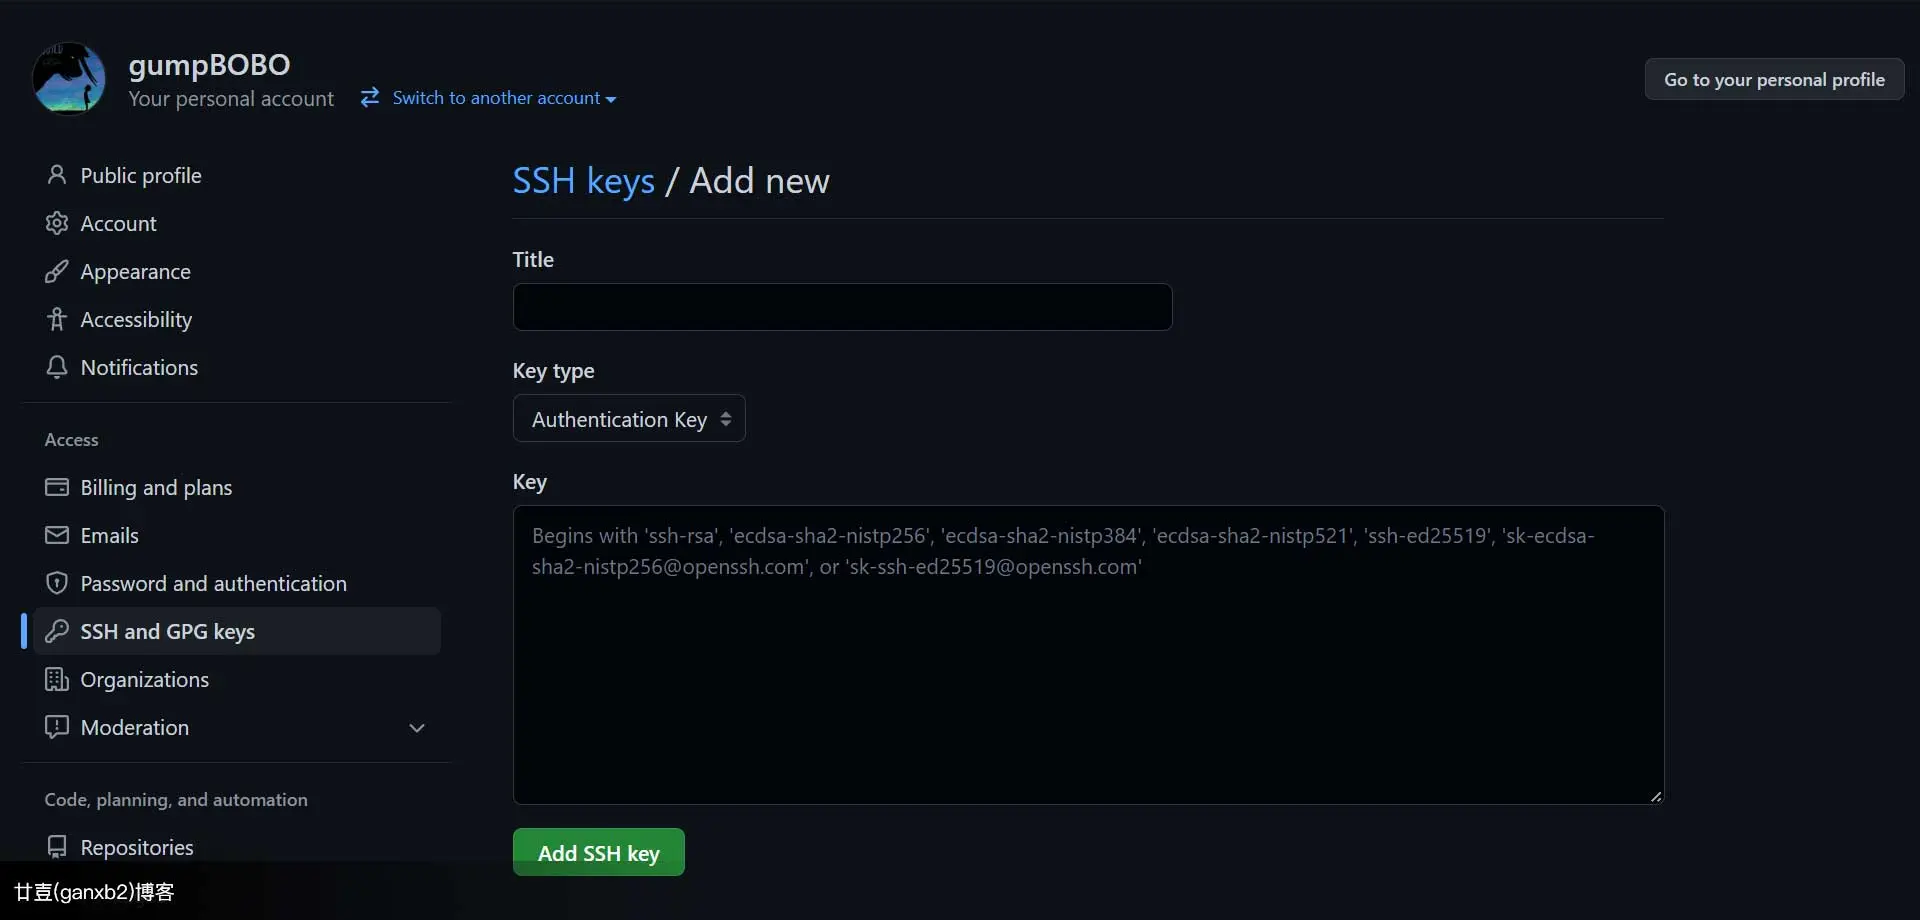
ssh-rsa ...github 网站添加公钥
第七步:安装 ngnix
网上的教程都是让用 yum 安装,并且还得解包啥的,千万别这么干,后面会一连串的错误….
直接使用 apt 安装
安装
1
2
3
4
5
6
7sudo apt install nginx
// 目录说明
/usr/sbin/nginx: 主程序
/etc/nginx: 存放配置文件
/usr/share/nginx: 存放静态文件
/var/log/nginx: 存放日志测试初始配置是否能成功启动
1
2
3
4
5sudo service nginx start #通过ubuntu的服务管理器启动
// 相关命令
sudo service nginx stop
sudo service nginx restart浏览器输入
1
2
3
4
5
6
7
8
9
10
11
12http://localhost/
// 或
127.0.0.1
// 页面输出
Welcome to nginx!
If you see this page, the nginx web server is successfully installed and working. Further configuration is required.
For online documentation and support please refer to nginx.org.
Commercial support is available at nginx.com.
Thank you for using nginx.修改配置
/etc/nginx/nginx.confvscode 图形化操作会报错
1
Permissions (FileSystemError): Error: EACCES: permission denied解决方法:
1
2
3sudo chown -R myuser(用户名) /path/to/folder(文件路径)
// eg:
sudo chown -R ganxiaobo /etc/nginx/nginx.conf小波的配置参考
1
2
3
4
5
6
7
8
9
10
11
12
13
14
15
16
17
18
19
20
21
22
23
24
25
26
27
28
29
30
31
32
33
34
35
36
37
38
39
40
41
42
43
44
45
46
47
48
49user ganxiaobo;
worker_processes auto;
events {
worker_connections 768;
}
http {
sendfile on;
tcp_nopush on;
tcp_nodelay on;
keepalive_timeout 65;
types_hash_max_size 2048;
include /etc/nginx/mime.types;
default_type application/octet-stream;
add_header 'Access-Control-Allow-Origin' '*';
add_header 'Access-Control-Allow-Headers' 'X-Requested-With';
add_header 'Access-Control-Allow-Methods' GET,POST,PUT,DELETE,OPTIONS;
server {
listen 80;
server_name 127.0.0.1;
location / {
root /home/ganxiaobo/work-area/www;
index index.html;
add_header X-Frame-Options ALLOWALL;
try_files $uri $uri/ /index.html;
}
}
server {
listen 8080;
server_name 172.30.166.156;
location / {
root html;
index index.html;
add_header X-Frame-Options ALLOWALL;
try_files $uri $uri/ /index.html;
}
}
ssl_protocols TLSv1 TLSv1.1 TLSv1.2 TLSv1.3; # Dropping SSLv3, ref: POODLE
ssl_prefer_server_ciphers on;
access_log /var/log/nginx/access.log;
error_log /var/log/nginx/error.log;
gzip on;
}注意
改了配置以后浏览器一直报错 500 ,是因为头部
user字段没有改成对应的用户查看 nginx 的启动对应用户
1
2
3
4
5
6
7
8
9
10
11
12ps aux | grep nginx
// 输出
root 6177 0.0 0.0 8676 828 ? Ss 22:45 0:00 nginx: master process /usr/sbin/nginx
ganxiao+ 6178 0.0 0.0 9348 3428 ? S 22:45 0:00 nginx: worker process
ganxiao+ 6179 0.0 0.0 9348 3420 ? S 22:45 0:00 nginx: worker process
ganxiao+ 6180 0.0 0.0 9348 3428 ? S 22:45 0:00 nginx: worker process
ganxiao+ 6181 0.0 0.0 9348 3424 ? S 22:45 0:00 nginx: worker process
ganxiao+ 6182 0.0 0.0 9348 3428 ? S 22:45 0:00 nginx: worker process
ganxiao+ 6183 0.0 0.0 9348 3428 ? S 22:45 0:00 nginx: worker process
ganxiao+ 6184 0.0 0.0 9348 3428 ? S 22:45 0:00 nginx: worker process
ganxiao+ 6186 0.0 0.0 9348 3428 ? S 22:45 0:00 nginx: worker process
ganxiao+ 6198 0.0 0.0 4024 2044 pts/2 S+ 22:45 0:00 grep --color=auto --exclude-dir=.bzr --exclude-dir=CVS --exclude-dir=.git --exclude-dir=.hg --exclude-dir=.svn --exclude-dir=.idea --exclude-dir=.tox nginx解决方法:nginx.conf 这里的
user要改成当前的用户1
user yourname;
第八步:安装 docker
很多文章包括菜鸟教程都是用的 sudo apt-key add - 来添加源,已经废弃了哈,千万不要用图形界面安装,会一直卡在加载服务 service is loading
- 添加源并把下载来的字符串添加到本地 trusted 数据库中
1 | |
更新后安装 docker 相关依赖
1
2sudo apt update
sudo apt install docker-ce docker-ce-cli containerd.io -y注意
报错:
Certificate verification failed: The certificate is NOT trusted.原因:因为证书错误
解决办法:
先把
etc/apt/sources.list的https改成http,执行sudo apt update再把
http改成https,执行sudo apt update再来执行上面的安装命令
sudo apt install docker-ce docker-ce-cli containerd.io -y将本地用户加入 docker 组,以便该用户无需
sudo即可执行docker命令1
2sudo usermod -aG docker $USER
newgrp docker启动看看是否安装成功
1
sudo service docker start检查 dockerd 进程启动
1
2
3
4
5
6
7
8
9
10service docker status
// 输出
* Docker is running
// 查看docker 启用者
ps aux|grep docker
// 输出
root 77 0.0 0.5 1760220 88460 ? Sl Apr18 0:01 /usr/bin/dockerd -p /var/run/docker.pid
root 90 0.0 0.3 1653120 56172 ? Ssl Apr18 0:06 containerd --config /var/run/docker/containerd/containerd.toml --log-level info
ganxiao+ 1327 0.0 0.0 4024 2032 pts/6 S+ 01:42 0:00 grep --color=auto --exclude-dir=.bzr --exclude-dir=CVS --exclude-dir=.git --exclude-dir=.hg --exclude-dir=.svn --exclude-dir=.idea --exclude-dir=.tox docker查看 Docker 版本
1
2
3
4
5
6
7
8
9
10
11
12
13
14
15
16
17
18
19
20
21
22
23
24
25
26
27
28
29docker version
// 输出
Client: Docker Engine - Community
Version: 23.0.3
API version: 1.42
Go version: go1.19.7
Git commit: 3e7cbfd
Built: Tue Apr 4 22:05:48 2023
OS/Arch: linux/amd64
Context: default
Server: Docker Engine - Community
Engine:
Version: 23.0.3
API version: 1.42 (minimum version 1.12)
Go version: go1.19.7
Git commit: 59118bf
Built: Tue Apr 4 22:05:48 2023
OS/Arch: linux/amd64
Experimental: false
containerd:
Version: 1.6.20
GitCommit: 2806fc1057397dbaeefbea0e4e17bddfbd388f38
runc:
Version: 1.1.5
GitCommit: v1.1.5-0-gf19387a
docker-init:
Version: 0.19.0
GitCommit: de40ad0建个容器
先去
etc/docker建个文件 daemon.json,贴入以下代码,然后重启service docker restart1
2
3
4# 建议使用中国科技大学
{
"registry-mirrors": ["https://registry.docker-cn.com","https://docker.mirrors.ustc.edu.cn"]
}vim 命令创建文件后,
:wq保存并关闭例子建个 hello-world
1
2
3
4
5
6
7
8
9
10
11
12
13
14
15
16
17
18
19
20
21
22
23
24
25
26
27
28docker run hello-world
// 输出
Unable to find image 'hello-world:latest' locally
latest: Pulling from library/hello-world
2db29710123e: Pull complete
Digest: sha256:4e83453afed1b4fa1a3500525091dbfca6ce1e66903fd4c01ff015dbcb1ba33e
Status: Downloaded newer image for hello-world:latest
Hello from Docker!
This message shows that your installation appears to be working correctly.
To generate this message, Docker took the following steps:
1. The Docker client contacted the Docker daemon.
2. The Docker daemon pulled the "hello-world" image from the Docker Hub.
(amd64)
3. The Docker daemon created a new container from that image which runs the
executable that produces the output you are currently reading.
4. The Docker daemon streamed that output to the Docker client, which sent it
to your terminal.
To try something more ambitious, you can run an Ubuntu container with:
$ docker run -it ubuntu bash
Share images, automate workflows, and more with a free Docker ID:
https://hub.docker.com/
For more examples and ideas, visit:
https://docs.docker.com/get-started/查看容器(镜像)集合
1 | |
第九步:固定 wsl2 静态 ip
windows 终端中查看 wsl2 子系统分发版
1
2
3
4wsl -l
// 输出
适用于 Linux 的 Windows 子系统分发版:
Ubuntu-22.04 (默认)初始化脚本
假定你创建在
C:\wsl2-start.bat,贴入以下代码 注意这是Ubuntu-22.04和你的发行版本对应1
2
3
4# 初始化脚本,注意这是 Ubuntu-22.04 和你的发行版本对应
wsl -d Ubuntu-22.04 -u root /etc/init.wsl
# 添加一个网卡
netsh interface ip add address "vEthernet (WSL)" 192.168.50.93 255.255.255.0创建自启动脚本
在 windows11 下 输入快捷键
WIN+R打开运行窗口,输入shell:startup,该目录下新建文本.txt,贴入以下代码后改名 ubuntu.vbs。1
2set ws=WScript.CreateObject("WScript.Shell")
ws.Run "C:\wsl2-start.bat",0回到 wsl2 中,创建文件并贴入代码,这里的创建路径和上面 9.2 步骤的 root 要一致
1
2
3
4
5
6
7
8sudo vim /etc/init.wsl
// 贴入内容
#network static ip
ip addr add 192.168.50.28/24 broadcast 192.168.50.255 dev eth0 label eth0:1
#docker start
service docker start
// :wq 保存退出再授权,重启电脑
1
sudo chmod +x /etc/init.wsl查看 ip
1
2
3
4
5
6
7
8
9
10
11
12
13
14
15
16
17
18
19
20
21
22
23
24
25
26
27
28
29
30
31ifconfig
// 输出
docker0: flags=4099<UP,BROADCAST,MULTICAST> mtu 1500
inet 172.17.0.1 netmask 255.255.0.0 broadcast 172.17.255.255
ether 02:42:5e:bd:5e:ce txqueuelen 0 (Ethernet)
RX packets 0 bytes 0 (0.0 B)
RX errors 0 dropped 0 overruns 0 frame 0
TX packets 0 bytes 0 (0.0 B)
TX errors 0 dropped 0 overruns 0 carrier 0 collisions 0
eth0: flags=4163<UP,BROADCAST,RUNNING,MULTICAST> mtu 1500
inet 172.30.166.156 netmask 255.255.240.0 broadcast 172.30.175.255
inet6 fe80::215:5dff:fe1a:ea58 prefixlen 64 scopeid 0x20<link>
ether 00:15:5d:1a:ea:58 txqueuelen 1000 (Ethernet)
RX packets 73 bytes 7159 (7.1 KB)
RX errors 0 dropped 0 overruns 0 frame 0
TX packets 11 bytes 866 (866.0 B)
TX errors 0 dropped 0 overruns 0 carrier 0 collisions 0
eth0:1: flags=4163<UP,BROADCAST,RUNNING,MULTICAST> mtu 1500
inet 192.168.50.28 netmask 255.255.255.0 broadcast 192.168.50.255
ether 00:15:5d:1a:ea:58 txqueuelen 1000 (Ethernet)
lo: flags=73<UP,LOOPBACK,RUNNING> mtu 65536
inet 127.0.0.1 netmask 255.0.0.0
inet6 ::1 prefixlen 128 scopeid 0x10<host>
loop txqueuelen 1000 (Local Loopback)
RX packets 0 bytes 0 (0.0 B)
RX errors 0 dropped 0 overruns 0 frame 0
TX packets 0 bytes 0 (0.0 B)
TX errors 0 dropped 0 overruns 0 carrier 0 collisions 0192.168.50.28 就是 WSL 的固定 IP 地址了。
第十步:安装 zsh , oh my zsh
安装 zsh
1
sudo apt install zsh成功后提示如下,选 y
1
2
3
4
5Do you want to change your default shell to zsh? [Y/n] y
Changing your shell to /usr/bin/zsh...
[sudo] password for ganxiaobo:
Shell successfully changed to '/usr/bin/zsh'.安装 oh my zsh
1
sh -c "$(curl -fsSL https://gitee.com/shmhlsy/oh-my-zsh-install.sh/raw/master/install.sh)"成功后输出
1
2
3
4
5
6
7
8
9
10
11
12
13__ __
____ / /_ ____ ___ __ __ ____ _____/ /_
/ __ \/ __ \ / __ `__ \/ / / / /_ / / ___/ __ \
/ /_/ / / / / / / / / / / /_/ / / /_(__ ) / / /
\____/_/ /_/ /_/ /_/ /_/\__, / /___/____/_/ /_/
/____/ ....is now installed!
Before you scream Oh My Zsh! look over the `.zshrc` file to select plugins, themes, and options.
• Follow us on Twitter: @ohmyzsh
• Join our Discord community: Discord server
• Get stickers, t-shirts, coffee mugs and more: Planet Argon Shop安装 zsh 插件
进入 oh-my-zsh 的 plugings 文件夹
1
cd ~/.oh-my-zsh/custom/plugins/安装 zsh-autosuggestions
zsh-autosuggestions 是一个补全插件,会根据输入的内容,关联出历史记录。按方向键右键,则会补全。
1
git clone https://github.com/zsh-users/zsh-autosuggestions安装 zsh-syntax-highlighting
zsh-syntax-highlighting 是一个高亮插件,会高亮语法,合法的命令是绿色,不合法在的命令会报红。
1
git clone https://github.com/zsh-users/zsh-syntax-highlighting.git配置环境
打开.zshrc 文件,输入命令
1
vim ~/.zshrc1
2
3
4
5
6
7// 注释原来的代码改成下面
#plugins=(git)
plugins=(
git
zsh-autosuggestions
zsh-syntax-highlighting
)运行
source ~/.zshrc命令,就可以生效了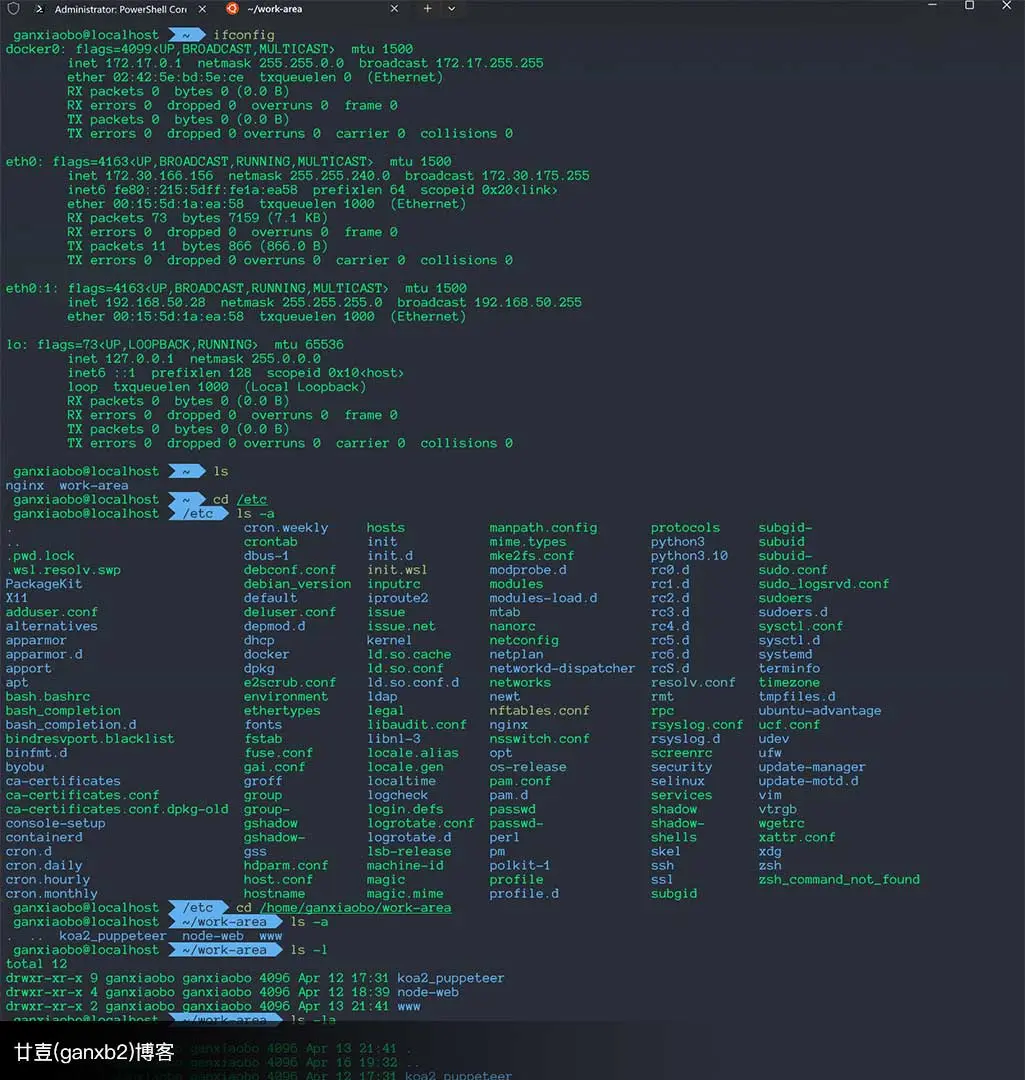
注意
更换 zsh 后原来的 nvm 装的 node 命令都会找不到,需要把5.3 步骤 .bashrc 增加的代码 copy 到 .zshrc
😫 搭建过程中小波遇见的问题
关于
apt和apt-get简单理解
apt是apt-get的升级版,如果版本环境允许的话,尽量用apt相关命令
😊 来自小波的 bilibili 视频教程
🙂 小波用到的相关参考资料链接
- https://blog.csdn.net/weixin_51245887/article/details/124393376 ↩
- https://blog.csdn.net/eastking0530/article/details/126613992 ↩
- https://blog.csdn.net/qq_41554005/article/details/124140839 ↩
- https://blog.csdn.net/qq_42362605/article/details/124898062 ↩
- https://blog.csdn.net/qq_20466211/article/details/124907397 ↩
- https://xuexb.com/post/nodejs-nginx-webserver.html ↩

『旅行者』,帮小波关注一波公众号吧。
小波需要100位关注者才能申请红包封面设计资格,万分感谢!
关注后可微信小波,前66的童鞋可以申请专属红包封面设计。


微信
支付宝